Installing Bathroom Fan Vent Pipe: A Comprehensive Guide
Installing a bathroom fan vent pipe is an essential step in ensuring proper ventilation and moisture control in your bathroom. This process involves creating a pathway for the moist air expelled by the fan to be discharged outdoors, preventing mold growth, mildew, and unpleasant odors. While seemingly straightforward, the installation requires careful planning and adherence to building codes to ensure a functional and safe system. This article provides a detailed guide on installing a bathroom fan vent pipe, covering key considerations, materials, and step-by-step instructions.
Understanding the Importance of Bathroom Ventilation
Bathrooms often have high humidity levels due to showering, bathing, and general use. This moisture can lead to various issues, including: *
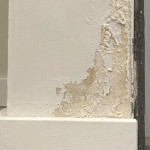
Mold and mildew growth:
Moisture provides an ideal environment for mold and mildew to thrive, damaging surfaces and posing health risks. *Wood rot and structural damage:
Persistent moisture can weaken wooden structures, leading to rot and compromising the integrity of your bathroom. *Unpleasant odors:
Dampness can trap odors, creating an unpleasant environment. *Increased energy costs:
High humidity requires more energy to maintain comfortable temperatures, leading to increased energy bills.A properly installed bathroom fan vent pipe effectively removes excess moisture, preventing these problems and creating a healthy and comfortable bathroom environment.
Materials and Tools for Bathroom Fan Vent Pipe Installation
Before starting the installation, gather the necessary materials and tools: *
Bathroom fan:
Choose a fan suitable for bathroom ventilation, considering its CFM (cubic feet per minute) rating, noise level, and features. *Vent pipe:
The vent pipe should be made of a moisture-resistant material such as PVC, ABS, or metal. Select the appropriate diameter according to the fan's CFM rating. *Flange:
A flange connects the vent pipe to the fan. *Elbows:
Use elbows to navigate corners and adjust the vent pipe's direction. *Pipe clamps:
Clamps secure the vent pipe to the wall or ceiling. *Caulk:
Apply caulk to seal gaps and prevent air leaks. *Insulation:
Insulate the vent pipe to prevent condensation and reduce heat loss. *Electrical wire:
Connect the fan to a power source using appropriate electrical wire. *Safety equipment:
Wear safety glasses, gloves, and a respirator when working with hazardous materials. *Measuring tape:
Measure distances and cut pipes accurately. *Level:
Ensure the vent pipe is installed level. *Saw:
Cut the vent pipe to the desired lengths. *Drill:
Drill holes for pipe clamps and electrical wire. *Screwdriver:
Secure pipe clamps and other components. *Utility knife:
Cut insulation and other materials.Step-by-Step Installation Guide
Follow these steps to install a bathroom fan vent pipe:
1. Plan the Route:
Determine the shortest and most direct route from the fan to the exterior wall. Avoid obstructions like joists and plumbing pipes. Consult local building codes for specific requirements regarding vent pipe routing.2. Prepare the Fan:
Install the bathroom fan following the manufacturer's instructions. Ensure the fan is securely attached and positioned correctly.3. Attach the Flange:
Connect the vent pipe flange to the fan outlet using the provided hardware.4. Cut and Connect the Vent Pipe:
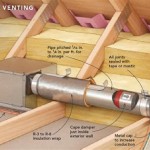
Measure the distance from the fan to the exterior wall. Cut the vent pipe to the appropriate length using a saw. Connect the vent pipe sections using elbows and secure them with pipe clamps.5. Install the Vent Pipe:
Securely attach the vent pipe to the ceiling or walls using pipe clamps. Ensure the pipe is level and runs smoothly.6. Seal the Vent Pipe:
Apply caulk around the vent pipe connections and joints to prevent air leaks and moisture infiltration.7. Install the Vent Cap:
Install a weatherproof vent cap on the exterior wall to prevent rain and debris from entering the vent pipe.8. Insulate the Vent Pipe:
Wrap the vent pipe with insulation to prevent condensation and reduce heat loss.9. Connect Electrical Wiring:
Connect the fan to a power source using appropriate electrical wire and follow all safety precautions.10. Test the Fan:
Turn on the fan and check for proper ventilation and air flow. Ensure the fan is operating quietly and effectively.Installing a bathroom fan vent pipe is a relatively simple DIY project, but it requires careful planning, following building codes, and utilizing the right materials and tools. By following these steps, you can create a functional and safe ventilation system for your bathroom, ensuring a healthy and comfortable environment.

Venting A Bath Fan In Cold Climate Fine Homebuilding

Installing A Bathroom Fan Fine Homebuilding

Blog

Inspecting The Bathroom Exhaust Internachi

Installing The Vent For A Bathroom Exhaust Fan

Why Does My Bathroom Ceiling Fan Drip Foothills Roofing Calgary

Air Sealing Bathroom And Kitchen Exhaust Fans Building America Solution Center

How To Size A Bathroom Exhaust Fan

Importance Of Bath Ventilation Installing Rigid Fan Venting

Install A New Bathroom Vent Fan Light
Related Posts


