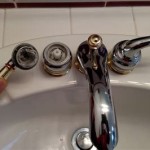
Installing a New Bathroom Sink Plumbing System
Replacing a bathroom sink and its plumbing can significantly enhance both the aesthetics and functionality of a bathroom. This comprehensive guide will walk through the process of installing a new bathroom sink plumbing system, covering the necessary steps and considerations for a successful installation.
Essential Tools and Materials
Before starting the project, gather all the necessary tools and materials. This preparation will streamline the installation process and prevent unnecessary delays.
* Adjustable wrench * Basin wrench * Channel-type pliers * Pipe wrench * Teflon tape * Plumber's putty * New sink * New faucet * P-trap assembly * Supply lines * Shut-off valves * Drain assembly * Tailpiece
Turning Off the Water Supply
Locate the shut-off valves under the sink. These valves control the hot and cold water supply to the faucet. Turn both valves clockwise to completely shut off the water flow. Once the valves are closed, turn on the faucet to release any remaining water pressure in the lines.
Disconnecting the Old Plumbing
Disconnect the supply lines from the shut-off valves using an adjustable wrench. Place a bucket underneath to catch any residual water. Next, use a basin wrench to disconnect the P-trap from the drainpipe and the sink tailpiece. Finally, remove the old sink by loosening the clips or screws holding it in place.
Installing the New Sink
Depending on the sink type (drop-in or undermount), the installation process will slightly vary. For drop-in sinks, apply a bead of plumber's putty around the sink's edge before placing it into the countertop cutout. Secure the sink with the provided clips or screws. For undermount sinks, follow the manufacturer's instructions for proper installation, which typically involve using silicone adhesive and mounting brackets.
Connecting the Faucet
Before installing the sink, it's usually easier to attach the faucet and drain assembly. Follow the manufacturer's instructions for attaching the faucet to the sink. This typically involves securing the faucet with nuts and washers from underneath the sink.
Connecting the Drain Assembly
Install the drain flange and rubber gasket in the sink drain opening. Tighten the nut from below to secure the drain flange. Connect the tailpiece to the drain flange and tighten it. Ensure the rubber washers are properly seated to prevent leaks.
Installing the P-trap
Assemble the P-trap according to the manufacturer's instructions. Apply Teflon tape to the threads of the P-trap components before tightening them together. Connect one end of the P-trap to the sink tailpiece and the other end to the drainpipe extending from the wall. Hand-tighten all connections before using a pipe wrench to give them a final quarter-turn.
Connecting the Water Supply Lines
Connect the new supply lines to the shut-off valves and the faucet tailpieces. Use an adjustable wrench to tighten the connections. Ensure the supply lines are correctly connected to the hot and cold water valves. Flexible supply lines are recommended for easier installation and maneuverability.
Testing for Leaks
Once all the connections are made, turn the water supply back on slowly. Check thoroughly for leaks around the shut-off valves, supply lines, faucet connections, and the drain assembly. Tighten any connections that show signs of leakage. If a leak persists, disassemble the leaky component, check for damage, and replace it if necessary. Running the faucet for several minutes with both hot and cold water will help ensure all connections are secure and leak-free.
Applying Sealant (Optional)
If using a drop-in sink, apply a bead of silicone sealant around the perimeter of the sink where it meets the countertop. This will create a watertight seal and prevent water from seeping underneath the sink. Smooth the sealant with a wet finger for a clean finish.
Waste Disposal Installation (If Applicable)
If installing a garbage disposal, follow the manufacturer’s instructions for connecting it to the drain assembly. This typically involves mounting the disposal to the underside of the sink and connecting the drain lines accordingly. Ensuring proper electrical connections is crucial for safe operation.

How To Fit A Bathroom Sink Diy Guides Victorian Plumbing

How To Replace And Install A Bathroom Sink

How To Install A Pipe From Sink Drain Wall Ehow

How To Replace And Install A Bathroom Sink

How To Plumb A Bathroom With Multiple Plumbing Diagrams Hammerpedia
How To Install A Concealed In Wall Bathroom Plumbing System

Bathroom Sink Plumbing Installation Diy Montreal
How To Install Bathroom Sink Drain Queen Bee Of Honey Dos

How To Plumb A Bathroom With Multiple Plumbing Diagrams Hammerpedia

How To Install A Bathroom Sink Drain 4 Steps With Pictures Instructables
Related Posts


