Vent Axia Bathroom Fan Stopped Working After Power Outage: Troubleshooting and Solutions
Vent Axia bathroom fans are designed to provide effective ventilation, mitigating moisture and preventing mold growth in bathrooms. These fans are typically reliable, but a common issue reported by homeowners arises after a power outage: the fan simply stops working. Determining the cause and implementing appropriate solutions requires a systematic approach. Understanding common electrical and mechanical issues and how they relate to power surges or fluctuations is crucial for diagnosing and resolving these problems.
A power outage can manifest a variety of problems related to electrical appliances. While most modern appliances have some level of surge protection, the unpredictable nature of power surges stemming from outages can sometimes overwhelm these safeguards. A sudden spike in voltage can damage sensitive electronic components inside the Vent Axia fan, particularly the motor or any integrated control circuitry. Conversely, a sudden drop in power followed by an abrupt return can also induce stress on the components, leading to failure. The precise nature of the damage can vary depending on the severity of the surge and the design of the fan model in question.
It is also necessary to consider that the problem might not be related to the power outage directly. The outage might simply coincide with a pre-existing condition that was already affecting the fan's operation. For example, a motor nearing the end of its lifespan might fail around the same time as a power surge, leading to a potentially incorrect assumption about the root cause. Therefore, a comprehensive evaluation of the fan's components is always advised regardless of suspicion surrounding a power outage.
Checking the Basics: Power Supply and Connections
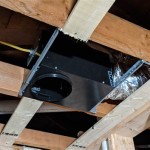
The initial step in troubleshooting a non-functional Vent Axia bathroom fan involves confirming the basics of power supply. This includes verifying that the circuit breaker controlling the bathroom circuit is properly switched on. Often, a power surge can trip the breaker, effectively cutting power to the fan. Accessing the electrical panel and resetting the appropriate breaker should be the first action taken. If the breaker immediately trips again upon resetting, there might be a short circuit somewhere in the circuit, potentially within the fan itself or the wiring leading to it. In such a case, further investigation by a qualified electrician is necessary.
Once the breaker is confirmed to be on, the next step is to physically inspect the wiring connections to the fan. Over time, vibrations or temperature fluctuations can cause wires to loosen from their terminals. This is especially true for older wiring installations. Carefully examine the wiring connections at the fan housing and at the junction box. Ensure that all wires are securely connected and that no wires are visibly damaged or frayed. If loose connections are found, tighten them securely. If there is evidence of damaged wiring, it should be replaced by a qualified electrician. When working with electrical wiring, power to the circuit must always be turned off at the breaker to prevent the risk of electric shock.
Furthermore, test the voltage at the fan connection point using a multimeter. This confirms whether power is actually reaching the fan. Set the multimeter to measure AC voltage and carefully probe the terminals where the fan wires connect. The reading should correspond to the standard voltage supply in the region (typically 120V in North America or 230V in Europe). If there is no voltage reading or a significantly lower voltage, it indicates a problem with the wiring or the circuit breaker. This absence of adequate voltage requires further electrical investigation by a professional.
Examining the Fan Motor and Internal Components
If the power supply and wiring connections are confirmed to be functioning correctly, the next step is to examine the fan motor and other internal components. Start by visually inspecting the motor for any signs of damage, such as burn marks, cracks, or discoloration. These visual cues can indicate that the motor has been compromised by a power surge or other electrical issue. Check the motor windings for any signs of insulation failure. This can be performed with a multimeter by measuring the resistance between the motor windings and the motor housing. A low resistance reading indicates insulation breakdown, meaning the motor is likely damaged and will require replacement.
The fan blades should also be checked for free rotation. Debris, dust, or even small objects can sometimes obstruct the blades, preventing the motor from starting. Manually attempt to rotate the fan blades. If they are difficult to turn or completely locked, carefully remove any obstructions you find. If the blades still do not turn freely after removing any visible obstructions, the motor bearings may be seized due to rust, corrosion, or lack of lubrication. Some fan motors have oil ports that allow for lubrication of the bearings. Applying a few drops of electric motor oil to these ports may help free up the bearings. If the blades still do not rotate freely, the motor is likely damaged and needs to be replaced.
Many Vent Axia fan models incorporate a capacitor that assists in starting the motor. Capacitors can be susceptible to damage from power surges. A faulty capacitor can prevent the motor from starting, even if the motor itself is in good working condition. The capacitor typically appears as a small cylindrical component attached to the motor. Inspect the capacitor for any signs of bulging, leaking, or physical damage. If any damage is apparent, the capacitor should be replaced. Replacing a capacitor requires matching its specifications (capacitance and voltage rating) exactly with a new capacitor. The capacitor should be discharged using a resistor before handling it to avoid electric shock.
Troubleshooting Integrated Control Circuits (if applicable)
Some Vent Axia fan models feature integrated control circuits that provide advanced functionality such as humidity sensors, timers, or automatic operation. These circuits are particularly vulnerable to damage from power surges. If the fan is equipped with such a circuit, and it is not functioning correctly after a power outage, the circuit board may have been damaged. This is particularly likely if the fan’s indicator lights are not illuminating or the control buttons are unresponsive.
Visually inspect the circuit board for any signs of damage, such as burnt components, cracked traces, or bulging capacitors. Use a magnifying glass to examine the board closely for any subtle signs of damage. If damage is observed, the entire circuit board may need to be replaced. In some cases, specific components on the board may be individually replaceable but this requires specialized knowledge in electronics repair. Furthermore, sourcing the correct replacement components may prove to be quite challenging.
If the circuit board appears to be in good condition, try resetting the fan to its factory settings. The reset procedure varies depending on the specific fan model, consult the manufacturer’s manual for instructions. This may restore functionality if the control circuit has been temporarily affected by the power outage. If resetting the fan does not resolve the issue, the circuit board is likely faulty and needs to be replaced. Replacing the entire fan unit might be more cost-effective than purchasing a replacement circuit board, depending on the age and availability of the fan model.
In scenarios where the fan incorporates humidity sensors, it is important to ensure those sensors are clean and unobstructed. Dust buildup can sometimes interfere with the sensor's accuracy, resulting in improper fan operation. Gently cleaning the sensor with a soft brush might restore its functionality.
Another potential problem area includes the timer mechanism built into certain fan models. A sudden power disruption can sometimes disrupt the timer's settings or damage the internal timer components. Consult the user manual for instructions on how to recalibrate or reset the timer function. If timer issues persist, the timer mechanism might be damaged and needs to be repaired or replaced.
Ultimately, dealing with integrated control circuits often requires a certain amount of technical expertise. When in doubt, it is best to consult with a qualified electrician or appliance repair technician who has experience with Vent Axia bathroom fans. Attempts to diagnose and repair complex electronic components without proper training can potentially worsen the problem or even create a safety hazard.

Va100 Selv Vent Axia

Vent Axia Lo Carbon Silhouette Selv Fan 100svh

Vent Axia 258112 Va100svlh12 Selv Humidistat Fans Gil Lec

Vent Axia 436532 Extractor Fan With Timer Backdraught Shutter

Vent Axia Pureair Sense Bathroom Extractor Fan Electricpoint Com

Vent Axia Silent Bathroom Fan Fixed Sd Intermittent Vasf100bo

Vent Axia Bathroom Extractor Fan Svara Black With Timer Humidity Temperature And Light Sensor Ø100 125 Mm App Controlled Ventilationland

Svara Vent Axia Bathroom Fan

Vent Axia 150mm Silhouette Extractor Fan Humidistat Toolstation

Vent Axia Svara Lo Carbon Axial Kitchen And Bathroom Fan 409802
Related Posts