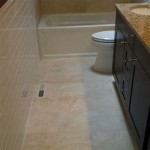
How To Lay Large Bathroom Wall Tiles
Installing large bathroom wall tiles can significantly enhance the aesthetic appeal of your bathroom, adding a touch of modern elegance and spaciousness. However, the process requires meticulous planning and execution, and it's essential to understand the proper techniques to achieve a professional and lasting result. This article will guide you through the key steps involved in laying large bathroom wall tiles, providing a detailed breakdown of each stage.
1. Preparation is Key: Setting the Stage for a Successful Installation
Before you start laying tiles, thorough preparation is crucial. This includes: *
Cleaning the Surface:
Ensure the walls are clean, free of debris, dust, and grease. Use a cleaning solution specifically designed for tile installation and allow the walls to dry completely. *Leveling the Surface:
Uneven walls can lead to uneven tile placement. Use a level and a plastering compound to smooth out any bumps or dips. *Assessing the Subfloor:
The subfloor should be strong and solid, free of any cracks or movement. If necessary, reinforce it with plywood or cement board. *Installing Waterproof Membrane:
Bathrooms are prone to moisture, so a waterproof membrane is essential. This can be a sheet membrane or a liquid-applied product, ensuring watertightness. *Setting Up a Layout:
Before applying any adhesive, mark out the layout of your tiles. This will ensure even spacing and a symmetrical design.2. Applying Adhesive and Installing the Tiles
Once the surface is prepared, you can start applying the adhesive and laying the tiles: *
Choosing the Right Adhesive:
Use a high-quality, tile-specific adhesive that's suitable for large tiles and your chosen substrate. *Applying the Adhesive:
Spread a thin layer of adhesive on the wall using a notched trowel, ensuring full coverage for the tile. *Positioning the Tiles:
Gently press the tiles into the adhesive, using a level to ensure they are straight and aligned. *Spacing and Grouting:
Use tile spacers to maintain consistent spacing between tiles, allowing room for grout. *Cleaning Excess Adhesive:
Immediately wipe away any excess adhesive with a damp cloth before it hardens.3. Grouting and Sealing the Tiles
After the adhesive has dried, you can grout the tiles to fill the gaps between them: *
Choosing the Right Grout:
Select a grout color that complements your tile and matches the desired aesthetic. Consider using a color-enhancing sealer to enhance the grout's color. *Applying the Grout:
Use a rubber float to apply the grout, pressing it into the gaps between tiles. *Cleaning Excess Grout:
Wipe away excess grout with a damp sponge, ensuring the grout lines remain clean and consistent. *Letting the Grout Dry:
Allow the grout to dry completely before applying a sealant. *Sealing the Grout:
A sealant helps protect the grout from stains and moisture. Apply a grout sealant according to the manufacturer's instructions.Laying large bathroom wall tiles is a time-consuming but rewarding project. By following these steps meticulously, you can create a beautiful and functional bathroom for years to come. Remember to always prioritize safety and consult professional advice if you have any doubts or concerns.
Large Format Wall Tiles Trends Designs Installations Tileist By Tilebar

Bathroom Tile Idea Use Large Tiles On The Floor And Walls 18 Pictures

Bathroom Tile Ideas Use Large Tiles On The Floor And Walls Realgres

Maximize Your Space With Large Format Tile The Blog

Bathroom Tile Ideas Use Large Tiles On The Floor And Walls Realgres

Have You Tried Large Format Tile S Of America

Bathroom Tile Ideas Use Large Tiles On The Floor And Walls Realgres

Bathroom Tile Idea Use Large Tiles On The Floor And Walls 18 Pictures

7 Good Looking Ways To Lay Stacked Tiles

10 New Ways To Lay Wall Tiles And Floor Tile Mountain Bathroom Designs Grey Interior Design
Related Posts


