How To Replace an Old Nutone Bathroom Fan
Replacing an old Nutone bathroom fan can significantly improve ventilation and reduce moisture buildup in a bathroom, thereby preventing mold growth and improving air quality. While the task may seem daunting, with careful preparation, the right tools, and a step-by-step approach, a homeowner can replace an old Nutone bathroom fan safely and effectively. This article provides a detailed guide on how to replace an old Nutone bathroom fan, covering everything from preparation and removal to installation and testing.
Before commencing any work, it is crucial to prioritize safety. Working with electrical components carries inherent risks, and taking necessary precautions is essential to prevent injury or damage to the property. Shutting off the power to the bathroom circuit is the most important step. Locate the circuit breaker that controls the bathroom and switch it to the "off" position. Double-check that the power is indeed off by testing the existing fan with a non-contact voltage tester. This tool provides an audible or visual indication when voltage is present, ensuring that the circuit is de-energized. Additionally, wearing appropriate safety gear, such as safety glasses and work gloves, is recommended to protect against debris and potential electrical hazards.
Gathering the necessary tools and materials before starting the project will streamline the replacement process. The following items are generally required: a new bathroom fan (compatible with the existing electrical wiring and ductwork), a screwdriver set (including both Phillips and flathead screwdrivers), wire strippers, wire connectors (such as wire nuts), a non-contact voltage tester, safety glasses, work gloves, a stepladder, a utility knife, pliers, measuring tape, and potentially a drywall saw or other cutting tool if modifications to the ceiling opening are needed. Having everything within reach will minimize interruptions and ensure a smoother installation.
Key Point 1: Preparation and Removal of the Old Fan
The first step involves carefully removing the existing Nutone bathroom fan. Start by removing the fan cover. Most Nutone fan covers are held in place by either spring clips or screws. Identify the type of fastener and carefully detach the cover. Spring clips typically require a gentle squeeze or push to release, while screws will need to be unscrewed. Set the cover aside.
Next, disconnect the electrical wiring. Locate the wiring compartment on the fan housing. This compartment usually contains a metal or plastic cover that is secured with screws or clips. Remove the cover to expose the electrical connections. Use the non-contact voltage tester again to confirm that the power is off, even after switching the circuit breaker. Carefully disconnect the wires, noting the color coding of each wire (typically black for hot, white for neutral, and green or bare copper for ground). Use wire strippers to disconnect each wire from the old fan's wiring. Use wire connectors to isolate the exposed ends of the house wiring if you are not immediately installing the new fan. This prevents accidental contact and potential electrical shock.
Disconnect the ductwork attached to the fan housing. The ductwork usually consists of a flexible or rigid duct that vents the air outside. Depending on the type of connection, the duct may be secured with duct tape, clamps, or screws. Carefully detach the ductwork from the fan housing. If duct tape is used, a utility knife may be necessary to cut through the tape. Be careful not to damage the ductwork during this process, as any damage could affect the fan's ventilation performance.
Finally, remove the fan housing from the ceiling. Nutone fan housings are typically attached to the ceiling joists with screws, mounting brackets, or spring clips. Depending on the installation method, carefully remove the fasteners securing the housing to the ceiling. It may be necessary to gently pry the housing loose if it is stuck or painted over. Be prepared for the housing to be heavier than expected, especially if it contains a motor or other components. With assistance, if possible, carefully lower the housing from the ceiling.
Key Point 2: Preparing the Opening for the New Fan
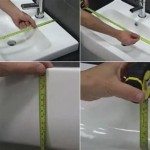
Once the old fan is removed, inspect the opening in the ceiling. Ensure that the opening is the correct size and shape for the new fan housing. Compare the dimensions of the new fan's housing to the opening in the ceiling. If the opening is too small, it may be necessary to enlarge it using a drywall saw or other cutting tool. Be careful not to cut too much, as a loose fit can compromise the fan's stability and performance. If the opening is too large, shimming may be necessary to create a snug fit.
Inspect the ceiling joists surrounding the opening. Ensure that the joists are strong enough to support the weight of the new fan. If the joists are damaged or weak, they may need to be reinforced with additional supports. This is particularly important if the new fan is heavier than the old fan. Also, ensure that the joists are properly positioned to allow for the fan housing to be securely attached.
Inspect the existing ductwork. Ensure that the ductwork is in good condition and properly aligned with the new fan's exhaust port. If the ductwork is damaged or misaligned, it may need to be repaired or replaced. Consider replacing flexible ductwork with rigid ductwork for improved airflow and reduced noise. Ensure the ductwork is properly insulated to prevent condensation and heat loss. If the ductwork is too short or too long, it may need to be adjusted to fit the new fan.
Key Point 3: Installing the New Fan and Connecting Wiring
Carefully position the new fan housing into the opening in the ceiling. Ensure that the housing is properly aligned with the ceiling joists and that the exhaust port is properly aligned with the ductwork. Secure the housing to the ceiling joists using screws, mounting brackets, or spring clips, depending on the installation method. Ensure that the housing is securely attached to the ceiling and that it does not wobble or move. Use a level to ensure that the housing is installed level.
Connect the ductwork to the fan housing. Secure the ductwork to the exhaust port using duct tape, clamps, or screws, depending on the type of connection. Ensure that the connection is airtight and that there are no leaks. Use foil tape instead of duct tape for a more durable and heat-resistant connection. Properly insulate the ductwork to prevent condensation and heat loss. Support the ductwork to prevent it from sagging or putting stress on the fan housing.
Reconnect the electrical wiring. Locate the wiring compartment on the new fan housing. Connect the wires from the house wiring to the corresponding wires on the fan, following the color coding (black to black, white to white, and green or bare copper to green or bare copper). Use wire connectors to securely connect the wires, ensuring that the connections are tight and that there are no exposed wires. Tuck the wires neatly into the wiring compartment and replace the cover. Ensure that the wiring is properly secured and that it does not interfere with the fan's operation.
Install the fan motor and fan blade assembly. Most new fans come with a motor and fan blade assembly that is separate from the housing. Carefully attach the motor and fan blade assembly to the housing, following the manufacturer's instructions. Ensure that the assembly is properly aligned and that the fan blade spins freely. Some models may require lubrication of the motor bearings. Listen for any unusual noises or vibrations when the fan is running.
Install the fan cover. Attach the fan cover to the housing using spring clips or screws, depending on the type of fastener. Ensure that the cover is securely attached and that it does not wobble or move. Clean the fan cover to remove any dust or fingerprints. Inspect the fan cover for any damage or defects.
After the new fan is installed, restore power to the bathroom circuit. Switch the circuit breaker back to the "on" position. Test the fan by turning it on and off. Ensure that the fan operates smoothly and quietly. Check for any unusual noises or vibrations. Verify that the fan is effectively venting air from the bathroom. Use a smoke stick or tissue to visually confirm airflow.
Finally, inspect the installation for any leaks or gaps. Seal any gaps around the fan housing with caulk or sealant to prevent drafts and moisture from entering the ceiling. Clean up any debris or tools from the work area. Dispose of the old fan and any used materials properly. This completes the replacement of the old Nutone bathroom fan.

Nutone Bath Fan Upgrade Kit Model 690nt

Not Sure How To Remove Old Bathroom Fan Install New One Doityourself Com Community Forums

Nutone S Qt80nb Bath Fan Repair Replace Or Upgrade Options

Broan Nutone Bath Fan Model 765h80l Disassembly Repair Help

Bathroom Fan Repair

Nutone S 605 605n 665n 668n Replacement Fan Motor 85598000 Instructions

Bathroom Fan Repair

Nutone S Find Bath Fan Parts

Broan Nutone Quickit 60 Cfm 3 0 Sones Bathroom Replacement Motor And Grille Cover Bkr60 The Home Depot

Removing Cleaning Old Kitchen Exhaust Fan Doityourself Com Community Forums
Related Posts