How Do You Remove a Moen Bathroom Faucet Handle?
Replacing a worn or damaged bathroom faucet handle is a common DIY project that can enhance the look and functionality of your bathroom. Moen faucets are known for their durability and reliability, but even their handles can eventually show signs of wear. Removing a Moen faucet handle is a straightforward process that requires basic tools and a few simple steps. This article will guide you through the process, providing step-by-step instructions and essential tips to ensure a smooth removal.
Identifying the Handle Type
Moen bathroom faucets come with various handle designs, each requiring a slightly different removal process. It is crucial to identify the type of handle you have before proceeding.
Moen faucets typically feature two primary handle types:
- Lever Handles: These are the most common type and resemble a single lever that moves up, down, and sideways to control water flow and temperature.
- Cross Handles: These handles have two separate knobs, one for hot water and one for cold water.
Removing the Handle
Once you have identified your handle type, you can proceed with the removal steps.
Lever Handles:
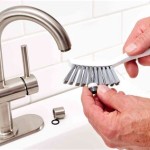
1. Locate the Set Screw: Most Moen lever handles have a small set screw located on the side of the handle, usually beneath a decorative cap or cover. You may need a small screwdriver to remove this cap if present.
2. Remove the Set Screw: Use the appropriate screwdriver to loosen and remove the set screw. This will release the lever handle from the stem.
3. Pull off the Handle: Gently pull the lever handle straight up and off the stem. The handle should come off easily once the set screw is removed.
Cross Handles:
1. Identify the Handle Attachment: Moen cross handles are typically attached to the stem with a nut or a set screw underneath the handle.
2. Loosen the Nut or Set Screw: Use a wrench or screwdriver to loosen the nut or set screw, depending on the handle's design.
3. Remove the Handle: Once the nut or set screw is loosened, pull the handle straight up off the stem.
Additional Tips
Here are some additional tips to make the process easier and more effective:
- Use Proper Tools: Ensure you have the correct screwdrivers and wrenches for your specific Moen handle type.
- Protect the Finish: If your faucet has a polished finish, use a soft cloth or a rubber-tipped wrench to prevent scratching.
- Avoid Force: If the handle shows resistance, do not force it. Gently examine the handle's attachment for any obstructions or hidden set screws before applying excessive force.
- Consult the Manufacturer: If you encounter difficulty or have any doubts, refer to the Moen faucet's installation manual or contact Moen customer service for guidance.
Removing a Moen bathroom faucet handle is a simple task with a few basic steps. By following these instructions, you can efficiently remove the old handle and replace it with a new one, restoring the functionality and aesthetic appeal of your bathroom faucet.

How To Remove Moen Bathroom Faucet Handle In 2 Steps

How Do I Replace My Moen Bathroom Faucet Cartridge

How To Remove Moen Bathroom Sink Faucet Handles Mr Kitchen Faucets

Tighten A Loose Lever On Moen Brantford Faucet

How To Fix A Dripping Moen Faucet Howtolou Com

Tighten A Loose Lever On Moen Brantford Faucet

Moen Bathtub Faucet Handle Repair

How To Remove Moen Bathroom Sink Faucet Handles Mr Kitchen Faucets

Moen Cau 2 Handle Low Arc Roman Tub Faucet Trim Kit In Chrome Valve Not Included T990 The Home Depot

How To Remove Moen Bathroom Sink Faucet Handles Faucets
Related Posts


