How to Do Bathroom Tiling Yourself
Transforming your bathroom with tile is a rewarding project that can significantly enhance the space's aesthetics and functionality. While professional tile installation is an option, undertaking this task yourself can be a fulfilling and cost-effective endeavor. However, it’s crucial to approach bathroom tiling with a well-defined plan, meticulous attention to detail, and the necessary tools and materials. This article provides a comprehensive guide to bathroom tiling, outlining the steps involved and key considerations to ensure a successful outcome.
1. Preparation: The Foundation for Success
A successful bathroom tiling project hinges on thorough preparation. This stage lays the groundwork for a smooth and durable installation. Here's what's involved:
a. Demolish Existing Surfaces: If your bathroom features existing tile, it must be carefully removed. Use a hammer and chisel, or a tile removal tool, to pry off the tiles without damaging the underlying substrate (wall or floor). Dispose of the debris responsibly.
b. Assess and Repair Substrates: Inspect the underlying surfaces (walls and floors) for any imperfections, cracks, or unevenness. Repair any damaged areas with patching compound or mortar, ensuring a smooth and level surface. This step is crucial for tile adhesion and long-term durability.
c. Waterproofing: In a bathroom, waterproofing is paramount to prevent water damage and leaks. Apply a waterproof membrane to the shower stall, tub surround, or any other areas prone to moisture exposure. This membrane acts as a barrier, protecting your walls and subfloor from water penetration.
d. Choose the Right Tile: Select tiles that are suitable for bathroom use, considering factors like durability, water resistance, and style. Porcelain and ceramic tiles are common choices for their practicality and aesthetic appeal. Determine the tile size and layout that best suits your bathroom's dimensions and design. Make sure to purchase enough tiles to cover the entire area, accounting for waste and potential breakage.
2. Layout and Installation: Precision is Key
Once the substrate preparation is complete, the tiling process begins. Accuracy and precision are essential throughout this stage. Follow these steps to ensure a flawless installation:
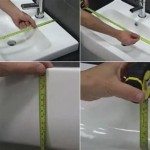
a. Establishing a Level Line: Begin by establishing a level line on the wall or floor using a level and a pencil. This line serves as a reference point for ensuring that the first row of tiles is installed perfectly straight. It's crucial to maintain a consistent level throughout the entire tiling process.
b. Tile Spacing and Mortar Application: When laying tiles, it's essential to maintain consistent spacing between them. Use tile spacers of the desired thickness to achieve uniform gaps. Apply mortar to the back of each tile, ensuring even coverage. Spread the mortar with a notched trowel, creating grooves that help distribute the mortar and enhance adhesion.
c. Tile Placement and Alignment: Carefully place the tiles on the prepared surface, ensuring each tile is level and aligned with the reference line. Gently tap the tiles with a rubber mallet to ensure proper seating and bonding with the mortar. Use a tile cutter or wet saw to adjust the size of tiles for corners and edges.
d. Grouting: After the mortar has cured, it's time to apply grout. Grout fills the gaps between tiles, creating a clean and finished look. Choose a grout color that complements the tiles. Apply grout using a rubber float, pressing it firmly into the joints. Wipe away excess grout with a damp sponge, ensuring a smooth and consistent finish.
3. Finishing Touches: Completing the Project
The final steps involve cleaning, sealing, and adding finishing touches to complete your bathroom tiling project.
a. Cleaning: Thoroughly clean the tiled surfaces after grouting, removing any residual grout haze or debris. Use a damp sponge and clean water, being careful not to dislodge the grout. Allow the grout to dry completely before proceeding with the next step.
b. Sealing: Sealing grout is essential for protecting it from water and stain penetration. Apply a grout sealer to the finished grout joints, following the manufacturer's instructions. This sealer creates a protective barrier, preserving the grout's appearance and extending its lifespan.
c. Caulking: Apply caulk to the edges and corners of the tiling, sealing any gaps or cracks. Use a mildew-resistant caulk for optimal durability and cleanliness in a bathroom environment.
d. Installation of Fixtures: Once the tile and grout have fully cured, you can reinstall the bathroom fixtures, such as the toilet, sink, or showerhead, ensuring they are properly secured and aligned.
Remember to follow the manufacturer's instructions for all materials and tools used in the tiling process. Safety is paramount; wear protective gear, such as goggles and gloves, throughout the project. With careful planning, meticulous execution, and a commitment to quality, you can transform your bathroom into a stylish and functional space with DIY tiling.

Diy Guide Tiling A Bathroom Tiles Direct

A Beginners Guide To Tiling Bathroom

How To Tile A Bathroom Wall With Wickes

How To Lay Bathroom Tile 5 Easy Steps Rubi Blog Usa

How To Tile A Bathroom Floor Wickes

How To Lay Bathroom Tile 5 Easy Steps Rubi Blog Usa

Laying Floor Tiles In A Small Bathroom Houseful Of Handmade

Laying Floor Tiles In A Small Bathroom Houseful Of Handmade

Checklist What You Need To Tile Your Bathroom Walls And Floors

Diy Modern Master Bath Remodel Part 3 Custom Tile Shower Install Pneumatic Addict
Related Posts