How To Install Ceramic Tile Bathroom Shower Floor Tiles And Grout
Installing ceramic tile on a bathroom shower floor is a project that can significantly enhance the aesthetic appeal and functionality of a bathroom. However, it requires careful planning, meticulous execution, and a thorough understanding of the materials and techniques involved. This article outlines the necessary steps to successfully install ceramic tile, ensuring a durable and watertight shower floor.
Preparation and Planning
The initial phase of any tiling project is critical for its success. Proper preparation ensures a smooth installation process and a long-lasting result. This phase involves several key steps:
Assessing the Existing Subfloor: The subfloor is the foundation upon which the tile will be installed. It must be structurally sound, level, and free of any debris, grease, or loose materials. Common subfloor materials include concrete, plywood, or cement backer board. If the existing subfloor is uneven, it will need to be leveled using a self-leveling compound or by applying a layer of thin-set mortar. Any signs of water damage or rot must be addressed before proceeding.
Planning the Layout: Before applying any mortar or tile, it is essential to plan the tile layout. This involves determining the starting point, often the center of the shower floor, and ensuring that the tiles are evenly spaced and aligned. Consider the location of the drain and any other fixtures that may affect the tile arrangement. Using a dry layout, place the tiles on the floor without mortar to visualize the final result and make any necessary adjustments. This step helps to avoid awkward cuts or narrow tile pieces in prominent areas.
Gathering Materials and Tools: Having the correct materials and tools readily available is crucial for efficiency. Essential materials include ceramic tiles, thin-set mortar, grout, sealant, and grout sealer. Necessary tools include a trowel (with the appropriate notch size for the chosen tile), a tile cutter or wet saw, a rubber grout float, a sponge, a bucket, a measuring tape, a level, and safety glasses.
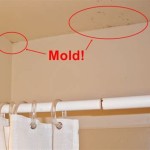
Ensuring Proper Waterproofing: Waterproofing is arguably the most critical aspect of shower floor tile installation. Water penetration can lead to mold growth, structural damage, and costly repairs. Apply a waterproofing membrane, such as a liquid membrane or a sheet membrane, according to the manufacturer's instructions. Pay close attention to corners, seams, and areas around the drain. Overlap the membrane onto the shower walls by several inches to create a seamless, watertight barrier.
Tile Installation
Once the preparation phase is complete, the actual tile installation can begin. This process requires careful attention to detail and consistent application of techniques to ensure a professional finish.
Mixing and Applying Thin-Set Mortar: Thin-set mortar is the adhesive that bonds the tile to the subfloor. Mix the mortar according to the manufacturer's instructions, ensuring a smooth, creamy consistency. Avoid adding too much water, as this can weaken the mortar. Apply the mortar to the subfloor using a notched trowel, holding the trowel at a 45-degree angle. Apply only enough mortar to cover a small area at a time to prevent it from drying out before the tiles are placed.
Setting the Tiles: Place each tile firmly into the mortar, using a slight twisting motion to ensure good adhesion. Use tile spacers to maintain consistent grout lines between the tiles. Regularly check the level of the tiles to ensure a flat and even surface. Remove any excess mortar from the tile surfaces with a damp sponge. Continue this process until the entire shower floor is covered with tiles.
Cutting Tiles: Inevitably, some tiles will need to be cut to fit around the edges of the shower floor, the drain, and any other fixtures. Use a tile cutter or a wet saw to make precise cuts. For complex shapes or curves, consider using a tile nipper. Always wear safety glasses when cutting tiles to protect your eyes from debris.
Allowing the Mortar to Cure: Once all the tiles are installed, allow the mortar to cure completely according to the manufacturer's instructions. This typically takes 24 to 72 hours. Avoid walking on the tiles during the curing process to prevent them from shifting or becoming dislodged.
Grouting and Sealing
After the mortar has fully cured, the next step is to grout the tiles. Grouting fills the spaces between the tiles, providing a watertight seal and enhancing the overall appearance of the shower floor.
Mixing and Applying Grout: Choose a grout color that complements the tiles. Mix the grout according to the manufacturer's instructions, ensuring a smooth, consistent texture. Apply the grout to the tile surface using a rubber grout float, working the grout into the joints at a 45-degree angle. Remove any excess grout from the tile surfaces with the float. Work in small sections to prevent the grout from drying out before it can be cleaned.
Cleaning the Grout: After applying the grout, wait for the recommended amount of time, typically 15 to 30 minutes, before cleaning the tile surfaces. Use a damp sponge to wipe away the excess grout, rinsing the sponge frequently in clean water. Be careful not to remove too much grout from the joints. Allow the grout to dry slightly before using a clean, dry cloth to buff the tile surfaces and remove any remaining grout haze.
Applying Sealant: After the grout has fully cured (typically after 72 hours), apply a sealant to the grout lines to protect them from water damage and staining. Use a grout sealer that is specifically designed for use in wet environments. Apply the sealant according to the manufacturer's instructions, wiping away any excess with a clean cloth. Allow the sealant to dry completely before using the shower.
Caulking: Apply caulk along the perimeter of the shower floor where it meets the walls and around the drain. Use a high-quality, mildew-resistant caulk that is specifically designed for use in wet environments. Apply the caulk in a smooth, even bead and use a caulk smoothing tool or your finger to create a professional finish.
Final Inspection: Once all the steps are completed, conduct a final inspection of the shower floor. Check for any cracks, chips, or imperfections in the tiles or grout. Address any issues promptly to prevent further damage. Ensure that all caulk and sealant are properly applied and that the drain is functioning correctly.
Key Considerations for a Successful Installation
While the steps outlined above provide a comprehensive guide, certain key considerations are crucial for achieving a successful and long-lasting ceramic tile shower floor installation:
Choosing the Right Tile
The selection of ceramic tile for a shower floor is a critical decision. The tile must be suitable for wet environments, offering adequate slip resistance to prevent accidents. Smaller tiles generally provide better slip resistance due to the increased number of grout lines, which offer more traction. Consider the porosity of the tile; denser tiles absorb less water and are more resistant to stains and mildew. Also, choose tiles that are rated for floor use; wall tiles typically are not durable enough for the constant wear and tear of a shower floor.
Ensuring Proper Slope to the Drain
A proper slope to the drain is essential for effective water drainage and to prevent water from pooling on the shower floor. The recommended slope is typically 1/4 inch per foot. This means that for every foot of distance from the wall to the drain, the floor should slope down by 1/4 inch. This slope can be achieved by carefully adjusting the height of the mortar bed during the tile installation process. Accurate measurement and consistent application are crucial for ensuring proper drainage.
Maintaining Adequate Ventilation
Proper ventilation in the bathroom, especially during and after showering, is essential for preventing moisture buildup and mold growth. Install an exhaust fan that is appropriately sized for the bathroom's square footage and use it every time the shower is used. Encourage airflow by opening windows or leaving the bathroom door ajar after showering. Regular cleaning and maintenance of the shower floor and grout lines can also help prevent the accumulation of mold and mildew.

How To Grout Tile In 6 Simple Diy Steps Architectural Digest

19 Pro Tips On Shower Tile Installation

How To Tile A Bathroom Shower Walls Floor Materials 100 Pics Pro Tips

How To Retile A Shower Floor Art Tile Renovation

How To Tile A Bathroom Shower Walls Floor Materials 100 Pics Pro Tips

How Not To Install Tile On Floors Walls And In Showers

Shower Floor Tile Walk In Ideas Www Westsidetile Com
How To Grout Natural Stone Pebble Shower Floors Jlc

10 Best Shower Floor Tiles In 2024 The Ultimate Guide

10 Tips To Install Subway Tile In Your Bathroom
Related Posts


