How to Remove a Bathroom Fan Grill
Bathroom exhaust fans are essential components of a well-ventilated bathroom. They effectively remove moisture and odors, preventing mold growth and maintaining indoor air quality. However, these fans require periodic cleaning and maintenance to function optimally. The first step in performing any maintenance, repair, or cleaning task is to safely and correctly remove the fan grill. This article provides a comprehensive guide on how to remove a bathroom fan grill, covering various types of grills and offering detailed instructions to ensure a smooth and safe process.
Understanding the different types of bathroom fan grills is crucial for selecting the appropriate removal technique. The most common types of grills include those held in place by springs, screws, or tabs. Some grills may also have a combination of these fasteners. Before attempting to remove any grill, it is important to identify the type of attachment mechanism.
Grills held in place by springs are typically the easiest to remove. These grills have two wire springs on either side that compress to allow the grill to be inserted into the fan housing. Screw-mounted grills, as the name suggests, utilize screws to secure the grill to the fan housing. These screws are usually visible on the surface of the grill. Tab-secured grills often use small plastic or metal tabs that snap into slots in the fan housing. These tabs may be hidden or slightly recessed, requiring careful examination to locate them.
Safety Precautions Before Starting
Prioritizing safety is paramount before commencing any work on electrical appliances, including bathroom exhaust fans. The first and most important safety precaution is to disconnect the power supply to the fan. This can be achieved by switching off the circuit breaker that controls the bathroom's electrical circuit. Locating the correct breaker in the electrical panel is vital. If unsure, testing the fan switch after turning off a breaker is recommended to confirm that the power is indeed disconnected. In addition, the use of a non-contact voltage tester to further verify the absence of power at the fan unit is advised as a double check.
Working at heights, even minor ones, requires precautions to prevent falls. Using a stable step stool or ladder is essential to safely reach the bathroom fan. Ensure the step stool or ladder is placed on a level and dry surface to prevent it from slipping. It is recommended to wear non-slip shoes when working at a height. Good lighting is also essential for clear visibility during the removal process. If the existing light fixture is insufficient, using a portable work light can illuminate the area and improve safety.
Dust and debris can accumulate inside the fan housing, potentially causing irritation or allergic reactions. Wearing safety glasses and a dust mask is recommended to protect the eyes and respiratory system from these irritants. Additionally, gloves can protect hands from any sharp edges or dirt present on the fan grill or housing.
Removing a Spring-Mounted Fan Grill
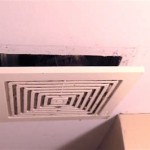
Spring-mounted fan grills are among the most common and easiest to remove. To begin, firmly grasp the grill with both hands. Position the hands on opposite sides of the grill, ensuring a secure grip. Gently push the grill upwards towards the fan housing. This action compresses the springs that hold the grill in place. While pushing upwards, carefully pull the grill downwards and away from the fan housing. The springs should disengage from their slots, allowing the grill to be removed. If the grill does not easily come down, applying slightly more pressure may be necessary. Avoid excessive force, which could damage the springs or the grill itself.
Once the grill is removed, inspect the springs for any signs of damage, such as bending or breakage. If the springs are damaged, they may need to be replaced to ensure the grill is securely reattached. Cleaning the grill after removal is recommended to remove accumulated dust and debris. Use a mild detergent and a soft cloth to clean the grill thoroughly. Allow the grill to dry completely before reattaching it to the fan housing.
When reattaching a spring-mounted grill, align the grill with the fan housing. Compress the springs and carefully insert them into their corresponding slots. Ensure that the grill is securely in place and that the springs are properly engaged. A slight tug on the grill can verify that it is firmly attached to the fan housing.
Removing a Screw-Mounted Fan Grill
Screw-mounted fan grills are secured to the fan housing with screws. To remove this type of grill, first locate the screws. They are usually visible on the surface of the grill, often recessed in small holes. Using an appropriate screwdriver, typically a Phillips head screwdriver, carefully unscrew each screw. It is important to use the correct screwdriver size to avoid stripping the screw heads. Place the screws in a safe place to prevent losing them. A small container or magnetic tray can be useful for this purpose.
Once all the screws are removed, the grill should detach easily from the fan housing. If the grill is stuck, gently wiggle it or use a flathead screwdriver to carefully pry it loose. Avoid using excessive force to prevent damaging the grill or the fan housing. Inspect the screw holes for any signs of damage or wear. If the screw holes are stripped, using slightly larger screws or screw anchors may be necessary to ensure a secure reattachment. Clean the grill thoroughly after removal to remove any accumulated dust and dirt. Use a mild detergent and a soft cloth, always allowing the grill to dry completely before reattaching it.
When reattaching a screw-mounted grill, align the grill with the fan housing and the screw holes. Insert the screws into the screw holes and tighten them carefully. Avoid over-tightening the screws, as this can strip the screw holes or damage the grill. Ensure that the grill is securely attached to the fan housing and that there are no loose screws.
Removing a Tab-Secured Fan Grill
Tab-secured fan grills utilize small tabs that snap into slots in the fan housing. Removing these grills requires a slightly different approach. First, carefully examine the grill to locate the tabs. The tabs are usually positioned around the perimeter of the grill. Depending on the design, they may be visible or slightly recessed. Once the tabs are located, gently push or press on the grill near each tab. This action should disengage the tab from its slot. It may be necessary to use a small flathead screwdriver to gently pry the tabs loose. Be careful not to apply excessive force, as this can break the tabs. Work around the perimeter of the grill, disengaging each tab one at a time.
Once all the tabs are disengaged, the grill should detach easily from the fan housing. If the grill is still stuck, carefully wiggle it or use the flathead screwdriver to gently pry it loose. Inspect the tabs for any signs of damage. If the tabs are broken, the grill may not securely reattach to the fan housing. In some cases, replacement grills may be necessary. Clean the grill thoroughly after removal to remove any accumulated dust and dirt. Use a mild detergent and a soft cloth, allowing the grill to dry completely before reattaching it.
When reattaching a tab-secured grill, align the grill with the fan housing and the tab slots. Gently press the grill into the fan housing, ensuring that each tab snaps into its corresponding slot. Listen for a clicking sound, which indicates that the tab is securely engaged. A slight tug on the grill can verify that it is firmly attached to the fan housing. If a tab does not engage properly, gently realign the grill and try again. Inspect the grill to ensure that all the tabs are securely engaged and that the grill is flush with the fan housing.
After successfully removing the bathroom fan grill, it is recommended to clean the fan unit itself. Dust, lint, and debris can accumulate inside the fan housing, reducing its efficiency and potentially causing a fire hazard. Use a vacuum cleaner with a brush attachment to remove any loose debris from the fan blades and the inside of the housing. A damp cloth can be used to wipe down the fan housing, but be careful not to get any water on the motor or electrical components. Allow the fan unit to dry completely before reattaching the grill and restoring power. Regularly cleaning the bathroom fan can help maintain its performance and extend its lifespan.

Remove Install A Bathroom Fan Grille In 1 Min

How To Clean Replace Light Broan Model 678 Exhaust Fan

Bathroom Vent Fan Remove Cover And Clean Dust

Tips For Installing Or Replacing A Bathroom Fan Forbes Home

How To Remove Clean Bathroom Ceiling Fan Nutone
How To Remove A Bathroom Fan Quora

How To Clean A Bathroom Extractor Fan Technical Guides Heatandplumb Com

How To Replace Bathroom Exhaust Fan Cover

Can T Get The Grill Off Nutone Fan Light Doityourself Com Community Forums

Bathroom Exhaust Fan S Cover Will Not Hold Into Place Doityourself Com Community Forums
Related Posts


