How to Stop a Bathroom Sink Leak
A bathroom sink leak is a common household problem that can lead to water damage, increased water bills, and the potential for mold growth. Addressing these leaks promptly and effectively is crucial for maintaining a healthy and functional home environment. This article provides a comprehensive guide to identifying the source of a bathroom sink leak and implementing the necessary steps to stop it.
The process of stopping a bathroom sink leak typically involves a combination of troubleshooting to pinpoint the leak's origin, gathering the necessary tools and materials, and executing the appropriate repair. The complexity of the repair can range from simple tightening of connections to replacing worn-out parts. Understanding the different components of a bathroom sink and their potential failure points is essential for successful leak resolution.
Identifying the Source of the Leak
The first step in stopping a bathroom sink leak is to meticulously identify its source. This requires a systematic inspection of all components under and around the sink. Common areas where leaks occur include the faucet base, faucet handles, drain assembly, supply lines, and P-trap.
Begin by visually inspecting the area around the faucet base where it meets the sink. Look for any signs of water pooling or dripping. Next, check the faucet handles while running the water. Observe if any water escapes from the base of the handles or around the faucet spout. If a leak is present, it often indicates worn-out O-rings or cartridges within the faucet.
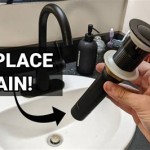
Inspect the drain assembly, specifically the area where the drain connects to the sink basin. Check for any cracks or corrosion on the drain flange or the surrounding putty. Also, examine the connection between the tailpiece (the pipe extending down from the drain) and the P-trap. Leaks in this area are often caused by loose connections or deteriorated washers.
The supply lines, which connect the water shut-off valves to the faucet, are another common source of leaks. Examine the connections at both ends of the supply lines for any signs of water seepage. Look for cracks or bulges in the supply lines themselves, as these can also indicate a potential leak point. Ensure the water supply shut-off valves themselves are not leaking.
Finally, inspect the P-trap, the U-shaped pipe under the sink. Check for any cracks or loose connections. The P-trap is designed to trap debris and prevent sewer gases from entering the home, and leaks in this area can result in unpleasant odors in addition to water damage.
To aid in leak detection, dry all suspected areas with a clean cloth. After running the water or using the sink, closely observe the dried areas for any signs of new water accumulation. This process can help pinpoint the exact location of the leak.
Gathering Tools and Materials
Once the source of the leak has been identified, gather the necessary tools and materials for the repair. Having the right tools on hand will make the repair process smoother and more efficient. The specific tools and materials required will depend on the nature of the leak, but a basic toolkit should include:
- Adjustable wrench: Used for tightening and loosening nuts and fittings.
- Basin wrench: A specialized wrench designed to reach tight spaces under the sink, often used for removing faucet nuts.
- Pliers: Useful for gripping and manipulating small parts.
- Screwdrivers (Phillips and flathead): Needed for removing screws and fasteners.
- Plumber's tape (Teflon tape): Used to seal threaded connections and prevent leaks.
- Plumber's putty: Used to create a watertight seal between the drain flange and the sink basin.
- Bucket: To catch any water that may drip during the repair.
- Clean cloths or towels: For cleaning up spills and drying surfaces.
- Replacement parts: Such as O-rings, cartridges, washers, supply lines, or drain assemblies, depending on the nature of the leak.
Before beginning any repairs, it is essential to shut off the water supply to the sink. Locate the shut-off valves under the sink and turn them clockwise until they are completely closed. If the shut-off valves are not functioning properly, the main water supply to the house may need to be shut off. It is crucial to test the valves after closing them to ensure they are effectively stopping the water flow before proceeding with the repair.
Performing Common Repairs
The following section outlines the procedures for addressing some of the most common bathroom sink leaks. The specific steps may vary depending on the type of faucet, drain assembly, and plumbing configuration.
Faucet Leaks: Replacing O-rings and Cartridges
Leaks around the faucet handles or spout often indicate worn-out O-rings or cartridges. To replace these parts, first, shut off the water supply to the sink. Remove the faucet handle by locating and loosening the set screw, which is typically located on the side or front of the handle. Once the handle is removed, you will likely see a retaining clip or nut that holds the cartridge in place. Remove the clip or nut and carefully pull out the cartridge.
Inspect the cartridge for any signs of damage or wear. Replace the cartridge with a new one that is compatible with the faucet model. Before installing the new cartridge, lubricate the O-rings with plumber's grease to ensure a proper seal. Reassemble the faucet in the reverse order, tightening all connections securely. If the leak persists after replacing the cartridge, the O-rings within the faucet body may need to be replaced as well. These O-rings can usually be accessed by disassembling the faucet further.
Drain Leaks: Tightening Connections and Replacing Washers
Leaks around the drain assembly can often be resolved by tightening loose connections or replacing worn-out washers. Begin by loosening the slip nuts that connect the tailpiece to the P-trap and the drain flange to the sink basin. Inspect the washers inside the slip nut connections for any signs of damage or deterioration. Replace any damaged washers with new ones of the same size and type.
Clean the threads of the tailpiece and the P-trap with a wire brush to remove any debris or corrosion. Apply plumber's grease to the threads to ensure a smooth connection. Reassemble the drain assembly, tightening the slip nuts securely. Be careful not to overtighten the nuts, as this can damage the pipes or washers. After reassembling the drain, run water into the sink and check for leaks. If the leak persists, the drain flange or the entire drain assembly may need to be replaced.
Supply Line Leaks: Tightening Connections and Replacing Lines
Leaks in the supply lines can typically be addressed by tightening the connections or replacing the lines entirely. First, shut off the water supply to the sink. Use an adjustable wrench to tighten the connections at both ends of the supply lines. Be careful not to overtighten the connections, as this can damage the fittings.
If tightening the connections does not stop the leak, the supply lines may need to be replaced. Disconnect the old supply lines from the shut-off valves and the faucet. Inspect the threads on the shut-off valves and the faucet for any damage or corrosion. Clean the threads with a wire brush and apply plumber's tape. Install the new supply lines, making sure to use the correct size and type of fittings. Tighten the connections securely, but avoid overtightening.
P-Trap Leaks: Tightening Connections and Replacing the Trap
Leaks in the P-trap are often caused by loose connections or cracks in the trap itself. Begin by loosening the slip nuts that connect the P-trap to the tailpiece and the drainpipe. Inspect the P-trap for any signs of cracks or damage. If the trap is cracked, it will need to be replaced.
If the P-trap is not cracked, inspect the washers inside the slip nut connections for any signs of damage or deterioration. Replace any damaged washers with new ones of the same size and type. Clean the threads of the tailpiece, drainpipe, and P-trap with a wire brush. Apply plumber's grease to the threads to ensure a smooth connection. Reassemble the P-trap, tightening the slip nuts securely. Be careful not to overtighten the nuts.
If these steps do not resolve the leak, it might be due to a more complex plumbing issue requiring the expertise of a professional plumber. Ignoring a persistent leak can lead to further damage and higher repair costs in the long run.
By systematically identifying the source of the leak and following the appropriate repair procedures, homeowners can often stop bathroom sink leaks and prevent further damage to their homes. Regular inspection and maintenance of bathroom sink components can also help to prevent leaks from occurring in the first place.

Bathroom Sink Drain Leaking Around Threads Premier Plumbing Inc

How To Fix A Leaking Bathroom Sink Paschal Air Plumbing Electric

Common Sink Leaks You Could Probably Fix Yourself

Bathroom Sink Drain Leaking Around Threads Premier Plumbing Inc

How To Fix Pipework A Tap Faucet Leaking Under The Sink

How Can I Stop My Sink From Leaking And Why Vent Inside Stinky Hometalk

New Bathroom Sink Drain Leaks At Threads

The Do S And Don Ts Of Dealing With A Bathroom Sink Or Shower Leak

Best Ways To Clean Your Bathroom Sink Drain Yourself

How To Fix A Leaky Faucet True Value
Related Posts


