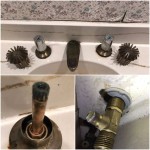
Replacing Caulk Around Bathroom Sink Drains
The caulk around a bathroom sink drain is crucial for preventing water damage. Over time, this caulk can crack, shrink, or become discolored due to exposure to moisture, cleaning chemicals, and constant use. Replacing this caulk is a simple DIY project that can significantly improve the aesthetic appearance of your bathroom and prevent potential leaks and mold growth.
Understanding the Importance of Replacing Caulk
Caulk serves as a sealant, creating a watertight barrier between the sink and the countertop. When caulk deteriorates, it allows water to seep into the surrounding areas, leading to various problems:
1.
Water Damage:
Water can seep into the subfloor, causing damage to the structure of your bathroom. Mold and mildew can also grow in these damp areas. 2.Mold and Mildew Growth:
Damp environments created by leaky caulk are ideal breeding grounds for mold and mildew, which can negatively affect air quality and health. 3.Unsightly Appearance:
Cracked or discolored caulk can detract from the overall aesthetics of your bathroom. 4.Leakage:
Water can leak through the cracks in the caulk, creating a messy and unpleasant experience.Steps for Replacing Caulk Around Bathroom Sink Drains
Replacing caulk around a bathroom sink drain is a straightforward process that can be completed with a few basic tools and supplies. Here's a step-by-step guide:
1.
Gather Supplies:
* Caulk gun * Silicone caulk (choose a mildew-resistant formula) * Utility knife * Caulk remover tool (optional) * Cleaning cloths * Masking tape * Gloves2.
Prepare the Area:
* Turn off the water supply to the sink. * Clear the area around the drain, removing any soap, debris, or other items that could interfere with the caulk application. * Remove the old caulk using a caulk remover tool or a utility knife. Be careful not to scratch the countertop. * Clean the surface thoroughly with a cleaning solution and a damp cloth. Make sure the area is dry before proceeding.3.
Apply Masking Tape:
* Apply masking tape around the perimeter of the drain, approximately 1/4 inch away from the existing caulk line. This will help create clean lines and prevent the caulk from spreading onto the countertop.4.
Apply Caulk:
* Cut the tip of the caulk tube at a 45-degree angle, creating an opening approximately 1/8 inch wide. * Insert the tube into the caulk gun and start applying the caulk along the edge of the drain, following the existing caulk line. * Apply a continuous bead of caulk, maintaining a smooth, consistent flow.5.
Smooth the Caulk:
* Use a damp finger or a caulk smoothing tool to smooth out the caulk bead, ensuring a clean and even finish. * Remove any excess caulk with a damp cloth.6.
Remove Masking Tape:
* Carefully peel off the masking tape while the caulk is still wet. This will prevent the tape from tearing the caulk. * Allow the caulk to cure fully according to the manufacturer's instructions. This typically takes 24 hours.7.
Clean Up:
* Remove any debris from the area surrounding the drain. * Turn the water supply back on and test for leaks. If any leaks are present, reapply caulk as needed.Tips for Success
Here are a few extra tips for a successful caulk replacement project:
1.
Choose the Right Caulk:
Opt for a mildew-resistant silicone caulk for bathrooms, as this type is specifically designed for areas with high moisture levels. 2.Apply in Small Beads:
Apply caulk in small, gradual increments to ensure smooth and consistent application. 3.Clean Up Immediately:
Clean any excess caulk immediately while it is still wet. 4.Let it Cure:
Allow the caulk to cure completely before using the sink. This ensures proper adhesion and prevents damage to the caulk.Replacing caulk around a bathroom sink drain is a simple and affordable maintenance task that can significantly improve the lifespan of your bathroom and prevent costly repairs. By following these steps, you can ensure a watertight seal and a more aesthetically pleasing bathroom.
How To Re Caulk A Bathroom Sink Ifixit Repair Guide
How To Re Caulk A Bathroom Sink Ifixit Repair Guide

How To Caulk A Drain 14 Steps With Pictures Wikihow Life

How To Re Caulk A Sink

How To Replace Caulk Around Your Bathroom Sink In A Few Minutes

Installing A New Bathroom Sink

How To Caulk A Bathroom Sink 12 Steps With Pictures Wikihow
How To Re Caulk A Bathroom Sink Ifixit Repair Guide

How To Caulk A Drain 14 Steps With Pictures Wikihow Life
How To Re Caulk A Bathroom Sink Ifixit Repair Guide
Related Posts


