Tools to Remove a Bathroom Sink Drain
A bathroom sink drain is a vital component of the plumbing system, allowing water to flow away from the sink. Over time, however, the drain can become clogged with hair, soap scum, and other debris, leading to slow drainage or even a complete blockage. To address these issues, it may be necessary to remove the drain assembly for cleaning or replacement. This process typically requires specific tools, depending on the type of drain and its installation.
Before attempting to remove a bathroom sink drain, it is prudent to shut off the water supply to the sink. This can usually be achieved by turning the shut-off valve located beneath the sink or on the wall. Once the water supply is off, it is essential to empty the sink of any remaining water to prevent spillage during the removal process.
Essential Tools for Removing a Bathroom Sink Drain
The specific tools required for removing a bathroom sink drain depend on the type of drain and its installation. However, some essential tools are commonly needed in most situations.
- Adjustable Wrench: This tool is used to loosen and tighten the drain nuts that hold the drain assembly in place.
- Channel-Lock Pliers: Similar to adjustable wrenches, channel-lock pliers can be used to grip and turn drain nuts, especially in tight spaces.
- Flat-Head Screwdriver: Some drain assemblies utilize screws to secure the drain cover or the overflow plate. A flat-head screwdriver is needed to loosen or remove these screws.
- Plumber's Putty Knife: This tool is handy for removing any old caulk or sealant around the drain assembly before installation.
- Gloves: It is advisable to wear gloves to protect your hands from the potential grime and bacteria present in drainage systems.
- Bucket: A bucket will help collect any residual water or debris that falls from the drain assembly during removal.
Types of Bathroom Sink Drains and Their Removal Techniques
Bathroom sink drains come in various designs, each with its own removal method. Some common types include:
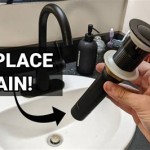
- Pop-Up Drain: This is the most common type of drain, typically found in modern bathrooms. These drains feature a lever or knob that controls the flow of water. To remove a pop-up drain, start by unscrewing the decorative drain cover, then remove the drain stopper. Finally, loosen the drain nut beneath the sink using an adjustable wrench or channel-lock pliers.
- Push-Button Drain: This type of drain has a push-button mechanism to control water flow. Removal typically involves loosening the drain nut beneath the sink and then removing the push-button assembly from the top. The drain stopper under the button may need to be removed as well.
- Basket Strainer Drain: This type of drain has a strainer basket that traps larger debris before it enters the drainage system. To remove a basket strainer drain, simply lift the strainer basket out of the drain opening. The drain nut beneath the sink may need to be loosened to remove the entire assembly.
Troubleshooting and Safety Considerations
When removing a bathroom sink drain, it is essential to be aware of potential problems and safety concerns.
Troubleshooting:
- Frozen Drain Nut: If the drain nut is frozen in place, try using a penetrating oil to loosen it for several minutes before attempting to turn it. If unsuccessful, a professional plumber may be required to prevent damage to the drain assembly.
- Damaged Drain Nut: If the drain nut is damaged or stripped, it may require replacement. It is recommended to use a new drain nut that is compatible with the existing drain assembly.
- Pipe Breakage: It is crucial to be careful when loosening the drain nut, as forceful turning can lead to pipe breakage. If you suspect a pipe has cracked or broken, contact a professional plumber immediately.
Safety Considerations:
- Water Supply: Always shut off the water supply to the sink before attempting to remove the drain. Ensure the shut-off valve is fully closed to prevent water from flowing while working on the drain assembly.
- Gloves and Eye Protection: Wear gloves to protect your hands from potential contamination. Eye protection is also recommended to prevent debris or chemicals from entering the eyes.
- Electrical Hazards: Be aware of the potential for electrical hazards when working near water. Ensure that all electrical appliances in the bathroom are turned off and unplugged before starting the removal process.
- Professional Assistance: If you encounter any difficulties or feel uncomfortable removing the drain assembly yourself, it is best to consult a professional plumber. They have the expertise and tools necessary to safely and efficiently handle the job.

How To Remove A Kitchen Sink Drain 13 Steps With Pictures

Husky Double Ended Tub Drain Wrench 16pl0128 The Home Depot

Husky Plumbing Hand Tools The Home Depot

Husky Double Ended Tub Drain Wrench 16pl0128 The Home Depot

Choosing The Right Drain Cleaning Tool Acme Tools

Drain Cleaning Tool Remove Unclog Sink Bath Hair Flexible No Chemicals

How To Use A Basin Wrench For Your Home Plumbing Projects Liberty

Husky Tub Drain Removal Tool 410 075 0111 The Home Depot

A Basin Wrench Not Always Required How To Use One

How To Fix A Bathroom Sink Drain Stopper 4 Easy Solutions
Related Posts


